Questionnaire/Survey data is called primary data as it is collected directly by researchers for their study and analysis from the primary sources of interest. When we use data collected by someone else for our analysis, it is called secondary data as it is not obtained directly by ourselves.
Download Example FileThis article will go over how we can input data from a questionnaire in Stata, and label the data and variables appropriately. This topic is covered in great depth in Chapter 2 of A Gentle Introduction to Stata by Alan C. Acock .
Example Questionnaire
To illustrate the process in Stata, we will use the following example of a simple questionnaire.
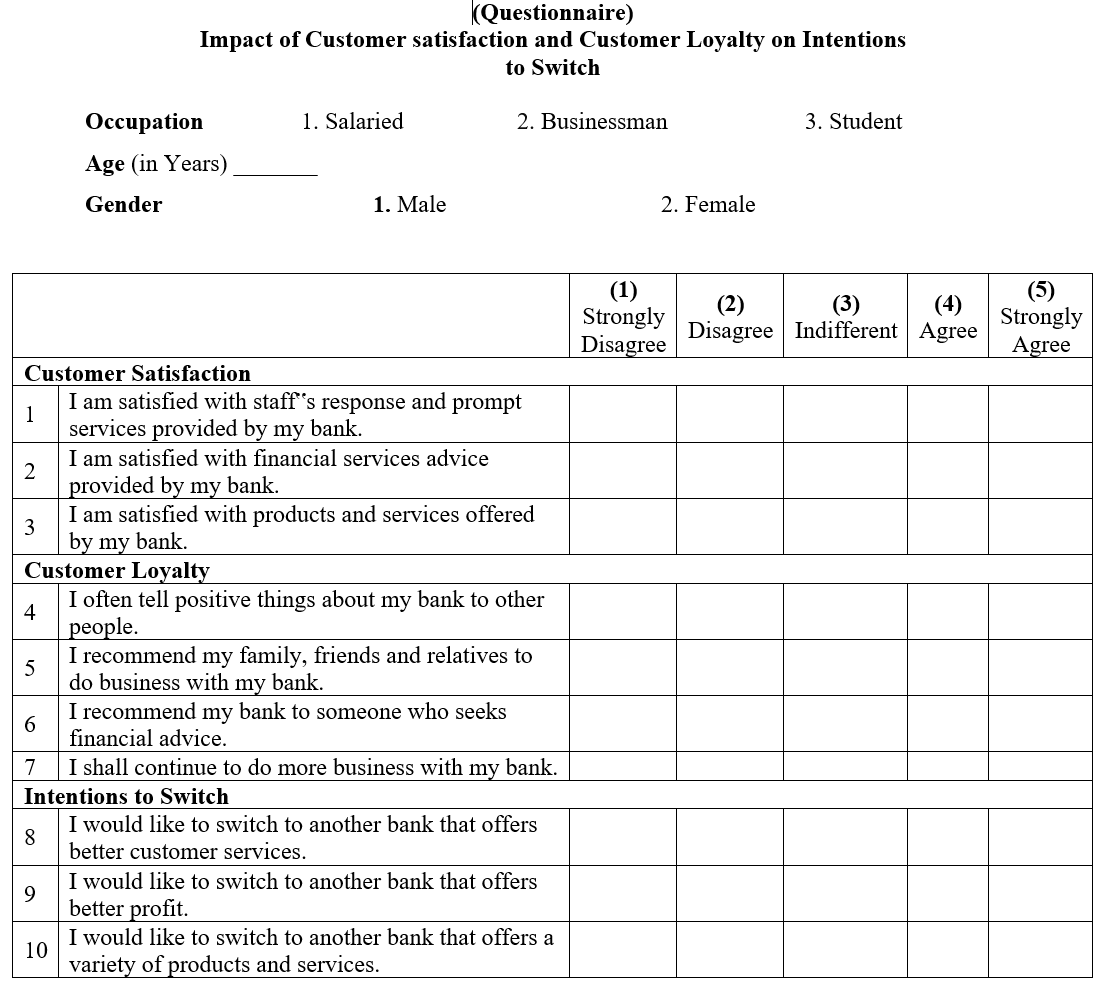
The survey questionnaire asks a respondent their occupation which is also coded with numbers 1, 2 and 3 for salaried people, businessmen, and students respectively. Such coding helps us quantify qualitative information to be later used in analysis. After that, apart from age, they are also asked their gender which is also quantified as 1 and 2 for male and female respectively.
After that, there are three clusters of questions: Customer Satisfaction, Customer Loyalty, Intentions to Switch. In each cluster, there are three, four and three questions respectively. The respondent is required to answer each of these ten questions on a 5-item likert scale.
Data
For this example, we have created mock data for each of the 13 items on the survey questionnaire. Since this data is created in Excel, the one downside is that when entering numeric values for categorical variables, we cannot specify what each number stands for. So, for example, the gender variable has values of 1 and 2, but without any indication of what they mean. Stata will allow us to assign appropriate labels to these values.
We have also added a serial number variable called ‘SN’ so that each observation can be uniquely identified easily in this respondent-level data. This can also help us correct any error or drop any observation that is problematic.
We can import the Excel sheet data into Excel by following menu options;
Menu option: File > Import > Excel spreadsheet (*.xls;*.xlsx) > Browse your file > Check ‘Import first row as variable names’
Or using the command:
import excel "sample data generation.xlsx", sheet("Sheet2") firstrowVariables Manager
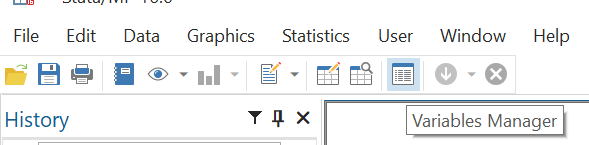
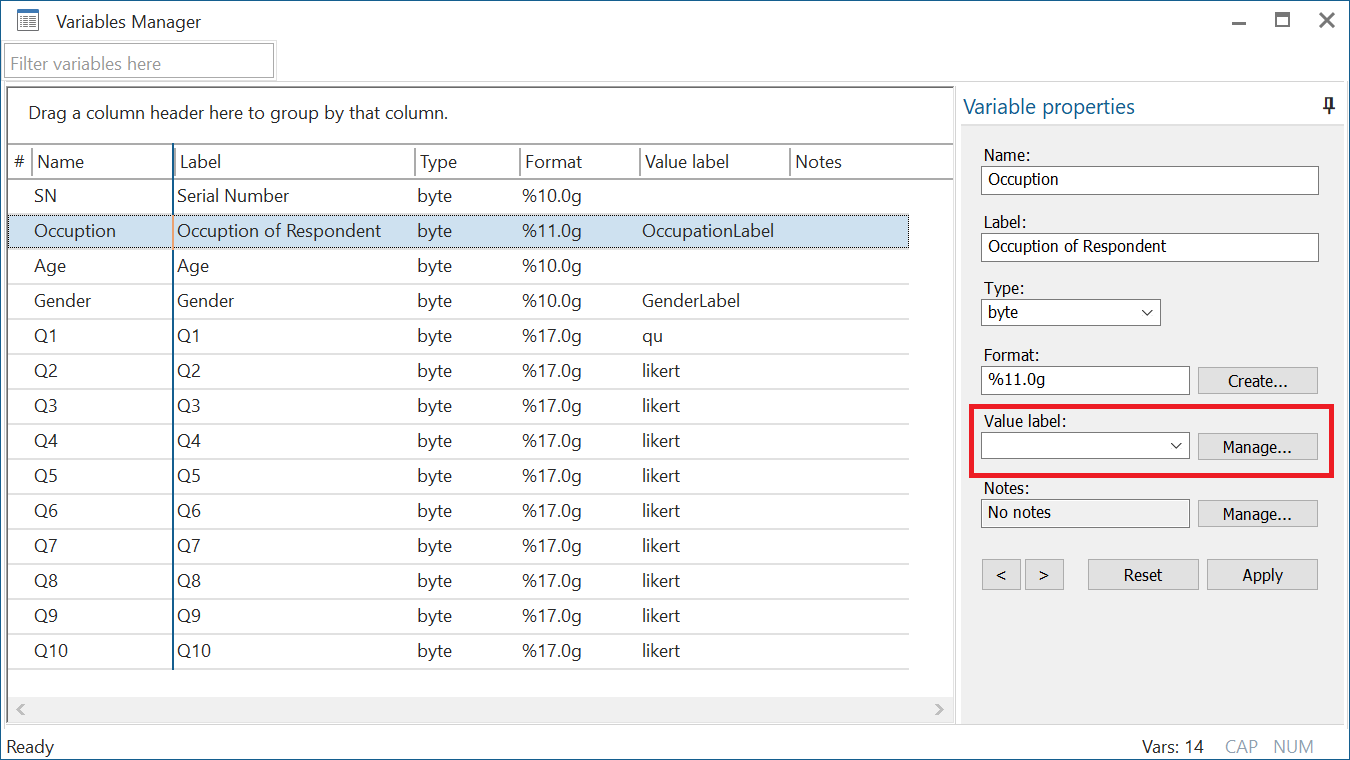
To work with variable names and labels, we will use the Variables Manager which can be accessed from the tenth button under the menu bar on Stata’s interface.
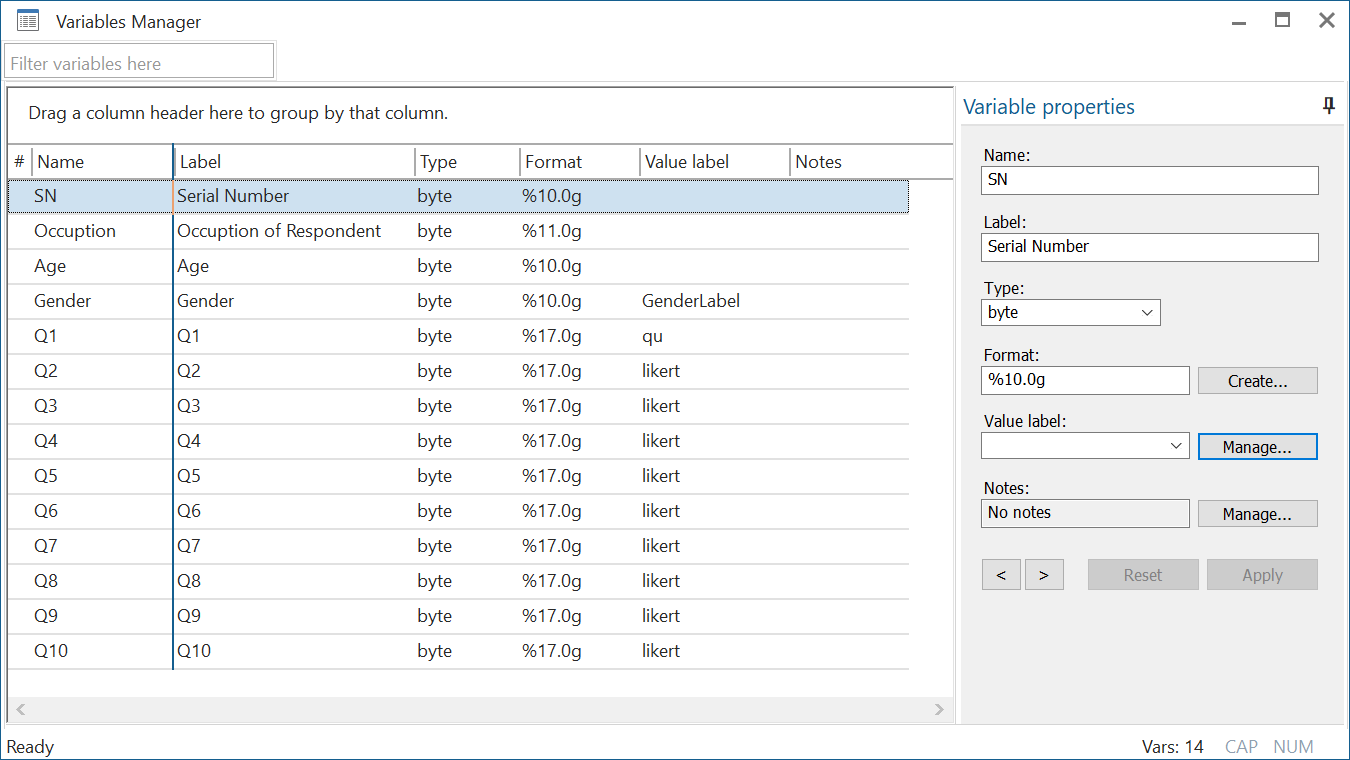
The Variables Managers opens up a window with a list of the variables, their labels, type, format, value labels and notes. You can also add notes for the entire dataset by right clicking on any variable name.
A section on the right of the window called ‘Variable properties’ allows us to edit each of these properties for the variables.
You can filter through the variable list if yours is very long using the field on the top left. You can also sort the columns based on a header by clicking on that header.
Adding Variable Labels
We will start by changing the label for variable ‘SN’ to make it say ‘Serial Number’ from this section on the right. It is very important to have appropriate label names for each variable otherwise others working on the same project (or even you!) may not remember or understand what an abbreviated variable name meant. Click on ‘Apply’ or press Enter to finalise your changes.
You can also use the command:
label variable SN "Serial Number"
Adding Value Labels
Let’s move on to the ‘Occupation’ variable. Remember that this variable only has values of 1, 2 or 3 that are not labelled with anything that may explain what they mean. For this we will highlight our variable of interest and then click on ‘Manage…’ in front of the Value label field in the section on the right.
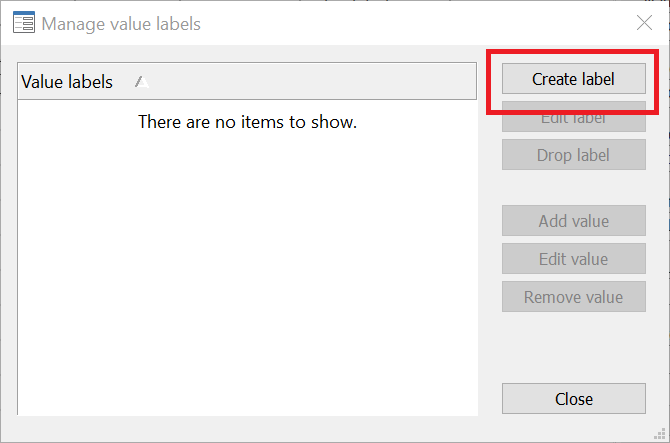
In the new dialogue box that opens, click on ‘Create label’.
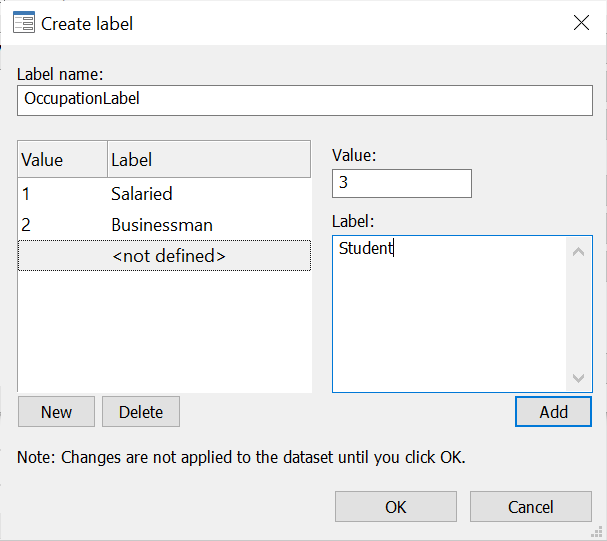
Here, let’s first enter a Label name. We’ll call it ‘OccupationLabel’ so we know what this set of labels is called. Label names cannot have a space so we write both words together. To label each of the numerical categories, we use the ‘Value’ field and ‘Label’ on the right of the window. The first category’s value is ‘1’ so we enter it in the ‘Value’ field, and an appropriate label for it is simply ‘Salaried’ based on how our questionnaire was designed, so we enter this in the ‘Label’ field. Click on ‘Add’.
Related Book: Mostly Harmless Econometrics by Joshua
This label will now be added to the list on the left.
Similarly, do the same for the value of 2 and 3 with labels, Businessman and Student respectively. Press OK.
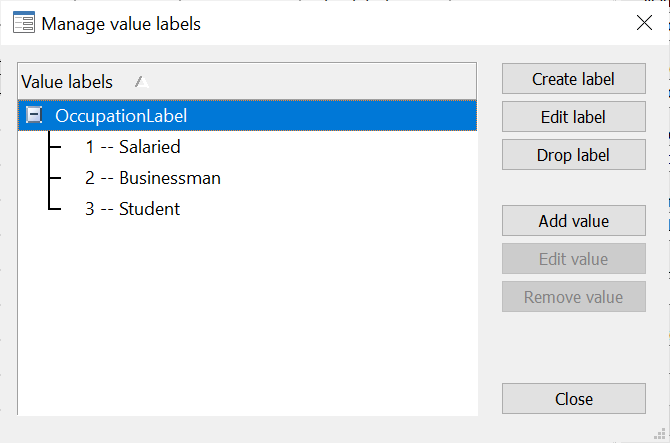
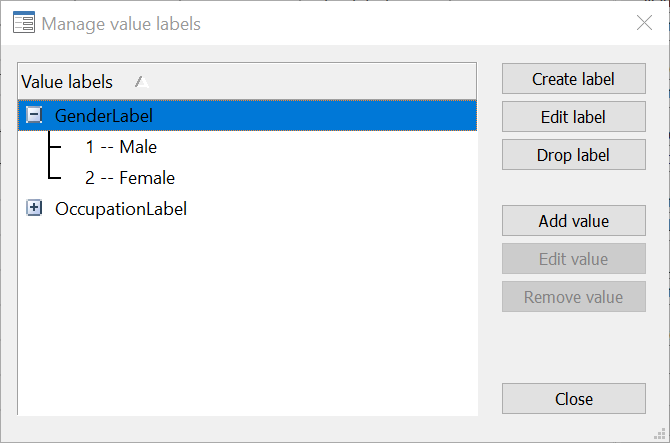
This value label will be added to a list of value labels now. We can also click on the label name to expand it and see what labels are assigned to each value.
Value labels can also be created using the label define command. Here, label defined (or lab def for short) is followed by the name of the label, which is then followed by the value being labelled, followed by the label being assigned to that value in inverted commas.
label define OccupationLabel 1 "Salaried" 2 "Businessman" 3 "Student"
Note that even though we have only created this label called ‘OccupationLabel’, we have not assigned it to any variable yet. To assign the label to the variable called ‘Occupation’, we go back to the Variables Manager, click on the drop-down Value label menu, choose the relevant label name, and click on Apply.
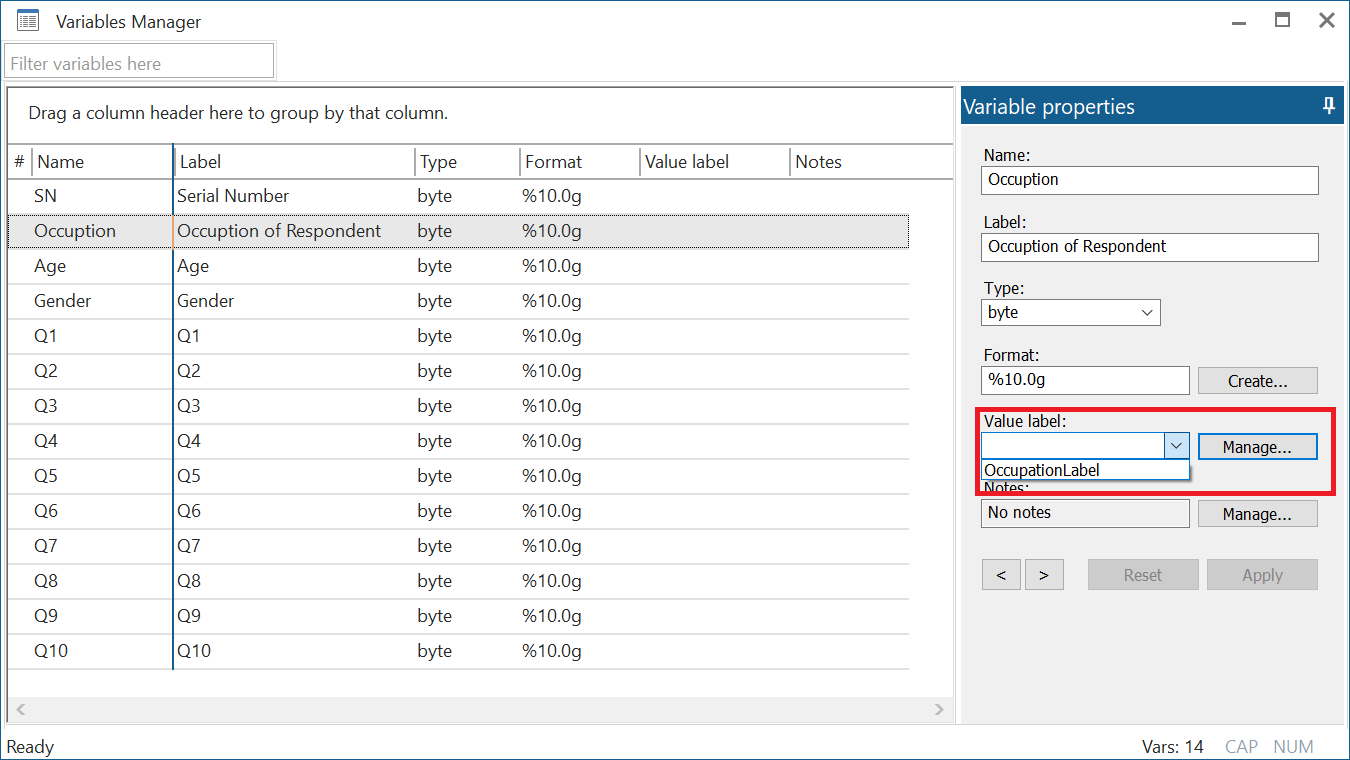
This can also be done using the command:
label values Occupation OccupationLabel
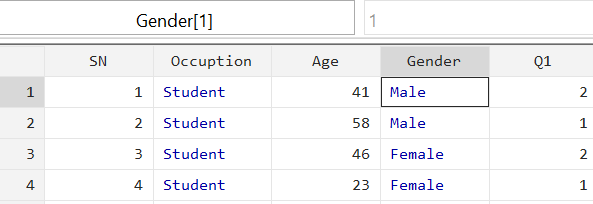
Browse your data to see how it has changed.
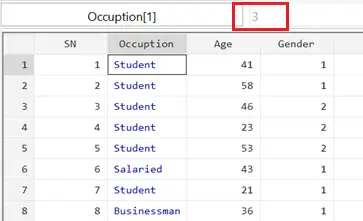
The ‘Occupation’ variable which only had values of 1, 2 and 3 before, now has relevant labels. Note that in the value field on top of the data set, it says ‘3’ to show what value is being represented by the selected cell, in this case ‘Student’.
In Stata, black values represent numerical data while red values are assigned to strings. Blue colour, as in this case, is for numerical data that has been labelled.
We will now also label the ‘Gender’ variable appropriately. First create the label by naming it and its values. Then assign it to the relevant variable.
The commands to define the label and label the variable values with this label would again be:
label define GenderLabel 1 "Male" 2 "Female" label values Gender GenderLabel
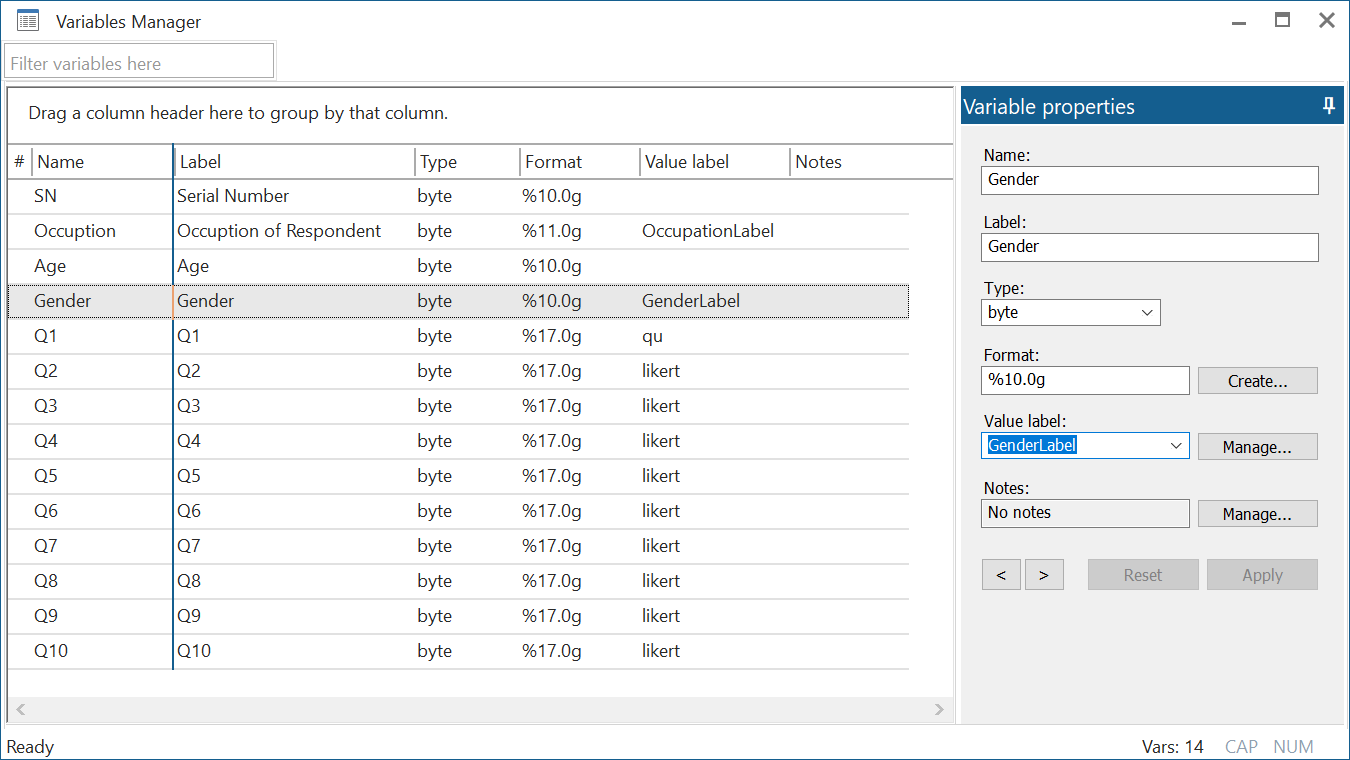
Each of the 10 question variables, ‘Q1’,…, ‘Q10’ also need to be labelled with the likert scale labels. Stata makes it convenient by allowing us to define the label once and apply it to the values of multiple variables.
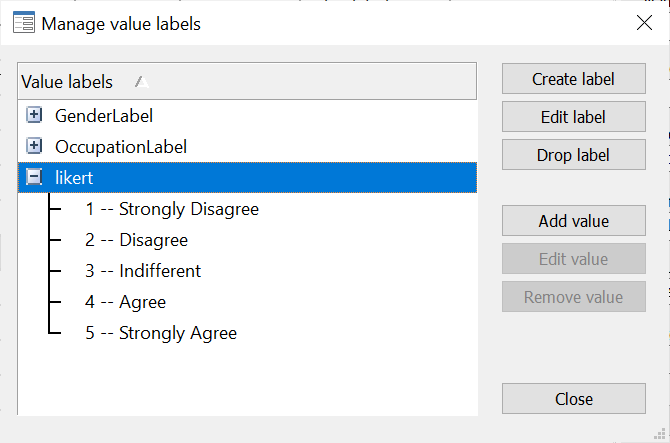
You can select all ten variables by holding down Shift+Arrow Down key on your keyboard, and choosing the ‘likert’ Value label from the Variables Manager. The label will be applied to each one of the question variables.
This can also be done using two commands:
label define likert 1 "Strongly Disagree" 2 "Disagree" 3 "Indifferent" 4 "Agree" 5 "Strongly Agree" label values Q1 Q2 Q3 Q4 Q5 Q6 Q7 Q8 Q9 Q10 likert
Listing and Dropping Labels
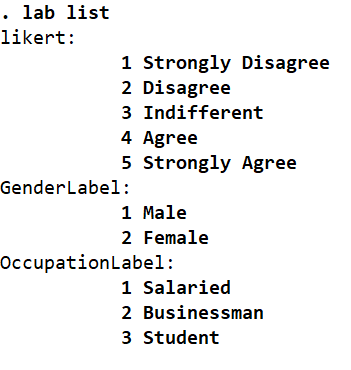
You can also use commands to check how many labels are present in the dataset and how they have labelled values.
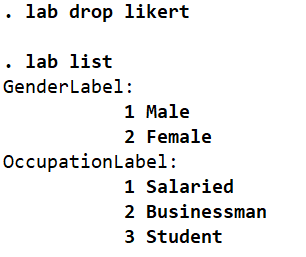
lab list
You can also drop a label altogether by using the command lab drop followed by the label name. Let’s drop the ‘likert’ label to illustrate this.
lab drop likert lab list