
For analyzing any data in Stata, the first step must be to make it readable to Stata. To read the data in Stata means you ought to import it in Stata. Before importing any data, remember to change your working directory according to your needs.
If you often deal with data stored as MS Excel spreadsheets, you need to learn the process of efficiently importing Excel data into Stata.
Importing Excel Data through Stata Menu:
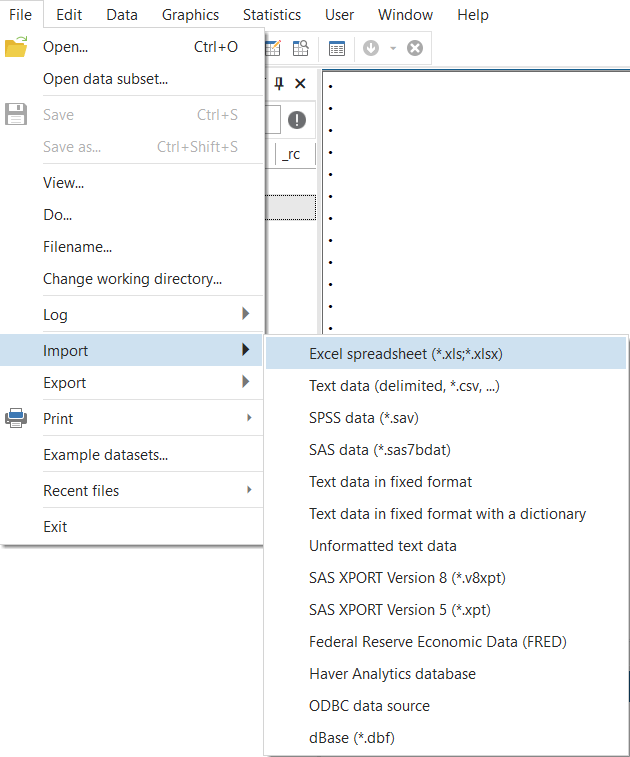
Importing through the menu is relevantly the easy way for a beginner to start working on Stata. When you open your software, you need to navigate to the “File” menu. From there you will have to choose “Import” and then select “Excel Spreadsheet”. A visual guide for these three steps is given below,
Once you follow this path, a pop up window will allow you to Browse for the Excel file you want to import. In this Excel Import Window, browse your desired Excel Spreadsheet. If your first row contains variable names, clicking on the option, shown below is necessary.

The pop up box gives you a lot more options to explore as well. You can define the Cell range, the Capitalization of your variables, and importing the data as string data. However, we can leave the option of choosing String data for later.
Importing Basic Excel Data through Commands:
Although the method above seems easier, the commands help you engage with Stata. While dealing with Excel files like “Players”, containing information about some of the most popular cricketers and footballers, including their names, genders, ages, and years of experience, the “import excel” command is your go to tool. By incorporating the “firstrow” option, you also inform Stata that the first row of this specific Excel Spreadsheets contains the variable names.
Your command for importing for this specific example should be
import excel Players, firstrow
Your Stata will show you the number of variables and observations imported upon running the command as such,

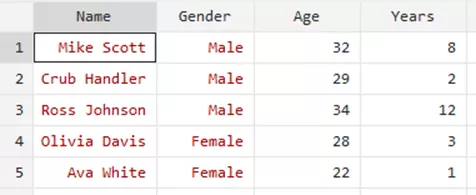
After ensuring that it aligns with your expected results, you can move forward to reviewing the imported data from the Data Viewer. Your data, with its variables would show up like this,

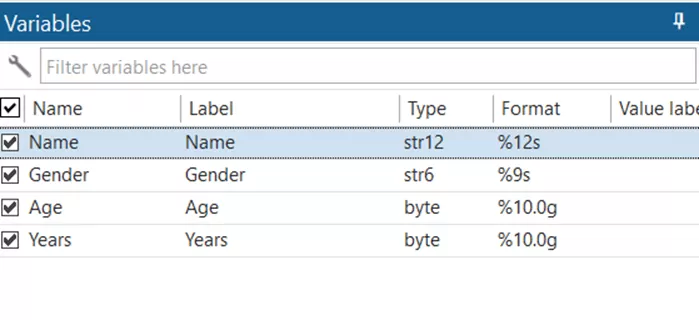
You can double check the variables from the Variables tab in the Data Viewer too, along with their properties down below.
Importing Excel Files with Multiple Sheets:
For Excel files with multiple sheets, the data importing is a little tricky. By default, the “import excel” command only imports the first sheet of your file. If the first sheet is not the one you want to work on, additional steps need to be done.
Let us assume, for a file with multiple sheets, for instance, “Players”, your Data viewer will show you these results,
Upon seeing your Excel Sheet, you would observe that the above imported data is from the first sheet of the Excel spreadsheet, as such,
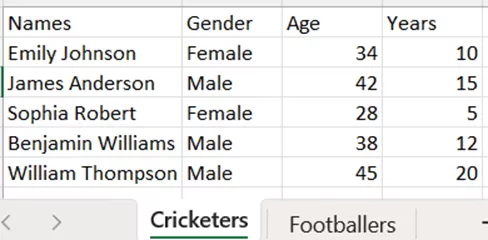
As we know by now, this data is from the first Excel sheet of the Spreadsheet “Players” and has data about the Cricketers rather than footballers. So, let us assume, that this was not your target data and you wanted to import data on the second sheet of the same Excel file i.e., the data about the footballers. In that case, by specifying the desired sheet using the sheet(“Footballers”) option in the import excel command, you can ensure that only the relevant data is imported.
Thus, for this specific example, your command would be,
import excel Players, firstrow sheet(“Footballers”)
The list command and the Data Viewer, both can show your relevant data as such,

Data Cleaning and Refinement:
In scenarios where your Excel file has extraneous data along with required information, you have to work on some options with your command to sieve your data from irrelevant material. Let us imagine another file titled, “Footballer3” which has data in this form,
If you import this data through
import excel Footballer3, firstrow
command, and then view the data in Data Viewer,
you will see your data in such format,

If you feel that the above imported data is cluttered and you want to exclude the comments that are written, you can use the cellrange() option. Thus, you identify the data range you want to import, for example from cell A1 to cell D6, your command would look something like this,
import excel Footballer3, firstrow cellrange(A1:D6)
Your Stata will filter out the unwanted data outside of that range. The desired number of variables and observations will be shown, neatly isolating the relevant data from the stray information. Your data will look like this,
Importing as String Data:
If you want to import all Excel data as string data, use the allstring option to achieve this. Taking previously mentioned spreadsheet as an example, the command would be,
import excel Players, firstrow allstring
Remember, the option of allstring is available for variables and data but it will not show in the dialogue box. You can ensure that the command worked by seeing the properties of variables.
You can also specify the numeric display format through the customizable option of allstring(“format”) Here, you need to specify the format you want.
Managing Variables:
If your Excel file’s variables have a mix of upper case and lower case letters, using the case(lower) option can help you in streamlining your data. The feature converts variable names from the first row into lower case, maintaining the consistency and simplifying analysis.
Your command should look like this to achieve this result,
import excel Footballer3, firstrow case(lower)
The variables will look like this,

If you feel the need to capitalize the variables, you only need to slightly modify the case() option. The command would be,
import excel Footballer3, firstrow case(upper)
If you only want to import a few varaibles from the excel file then the following command can be customized to your needs,
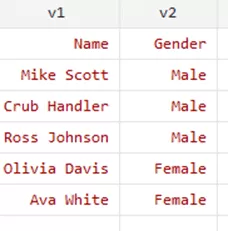
import excel v1 v2 using Footballer
here, v1 and v2 indicate Variable 1 and Variable 2 i.e. Name and Gender respectively. Thus your Data Viewer will only show these variables from the Excel Spreadsheet titled “Footballer”,
and you are good to go!
Additional Resources:
Has it ever happened that no matter what you do, you find this error in your output window?

Do not feel stuck, it is probably because you are not saving, exporting or clearing the data you are working on. Stata has a short memory, and it tries to remind you of that when you try importing new data without concluding the previous one.
The
clear
command can clear the previous data. This makes your software ready for newer imports without worrying about the previous one.
Whenever you feel jammed while importing Excel Spreadsheets, Stata’s
help import excel
command is a very valuable resource. It will open up a window that will fulfil all your needs relevant to the topic.

Exporting an Excel Spreadsheet:
Now, after learning imports, you are ready to export the Excel Spreadsheets. It may seem overwhelming but do not worry, as this section will specifically deal with the ways you can successfully export data in an Excel spreadsheet.
Exporting through the Stata Menu:
Start by opening the dataset in Stata that you want to export to an Excel file. If you have already been working on it, no need to repeat the deed. Click on “File” in the top-left corner. In the dropdown menu, select “Export.” In the export options, you will typically have several format options. Choose “Excel Workbook (.xlsx)” to export to an Excel file. A dialog box will appear where you can specify the file name and where you want to save it. Choose the folder and enter a name for your Excel file. You can choose to export all variables or only selected variables. You can do this by selecting variables from the list provided. Depending on your preferences, you might want to adjust other export options, such as whether to include variable names as column headers, whether to include value labels, etcetera. Once you’ve set your export options, click “OK” or “Save” to proceed with the export. Stata will typically display a confirmation message once the export is complete. A visual guide for the process is given below,

Exporting from the Commands:
Let us assume that you have been working on the Automobile data, provided by Stata. You can import the data from the,
sysuse auto.dta
command. After working on the data as required, you also would want to export the said data in an Excel file to save your progress. To export the file, we can employ the simple
export excel autodta.xlsx
command to export data from memory as Excel spreadsheet, aptly named “autodta.xlsx”. You can view your exported file in your working directory. This simple command can get your work done.
When exporting data to Excel, it is essential to be mindful of worksheet size limits. The .’xls’ files have a limit of 65,536 rows by 256 columns, while the ‘.xlsx’ files offer a more extensive limit of 1,048,576 rows by 16,384 columns. Moreover, the character limit for strings differs, with ‘.xls’ files accommodating 255 characters, compared to ‘.xlsx’ files, which can handle up to 32,767 characters!
Knowing the basics, if you want to customize your exports, you can work over the next section.
Customizing the Exports
Naming the Variables:
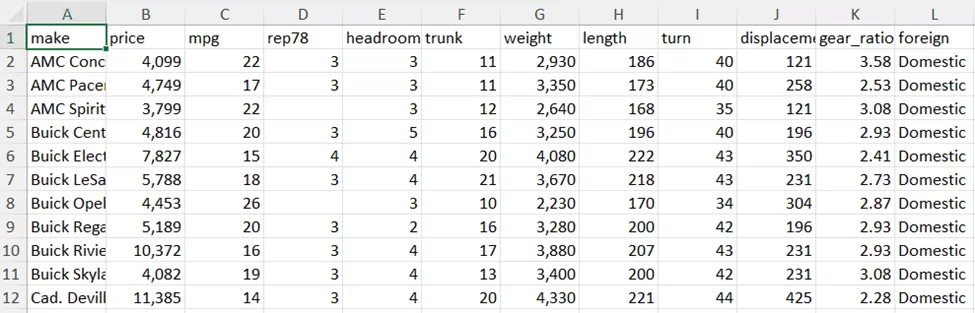
Upon opening the file, you would notice your exported excel file does not contain your variable names,

If you wish that your exported work displays variables, you can use the command,
export excel autodta.xlsx, firstrow(variables)
to ensure that your software understands that the first row of the data set needs to be included in the exported file as variables.
Your data will be saved in this format,
However, if you are repeatedly getting this error,

we have an explanation. This error is generated when you already have a file saved in your working directory with the same name. The existing ‘autodta.xlsx’ file will clash with this new file. There is a simple way to overcome this problem. You need to amend your command by introducing the ‘replace’ option as such,
export excel autodta.xlsx, firstrow(variables) replace
This will ensure successful execution of your export command. While customizing the same file repeatedly, you will need the ‘replace’ option often.
Command for the Missing Data:
Another quite obvious thing in the exported data is the missing values. These missing values may affect your analysis. To fill these empty cells, you can use the missing(“repval”) option in the export excel command. This option allows you to control how missing values are displayed in the exported Excel file. Your command for a specified example is,
export excel autodta.xlsx, missing("0") firstrow(variables) replaceHere, we have specified that the missing values would be represented by 0. You can choose to represent these values as either a specific string or numeric value of your choice. Your spreadsheet would replace the missing values as such,

If this option is not specified, when you export data to Excel using the ‘export excel’ command, missing values are shown as empty cells in the Excel Spreadsheet by default.
Using the Cell Option:
Now, let us assume that you want to leave the first few rows of your Excel Spreadsheet blank. The cell(start) option in the export excel command is used to specify the starting cell or position within the Excel spreadsheet where the exported data should begin. This option allows you to control the location in the Excel sheet where your data is placed.
For instance, you can use cell(start) to specify that the exported data should start from a particular cell address, such as “A1” or “B3,” within the Excel sheet. This can be helpful when you want to insert data into a specific area of an existing Excel file or when you want to format the layout of your data within the sheet.
Here’s a basic example of how to use the cell(start) option:
export excel using "autodta.xlsx", cell(A4) firstrow(variables) replace
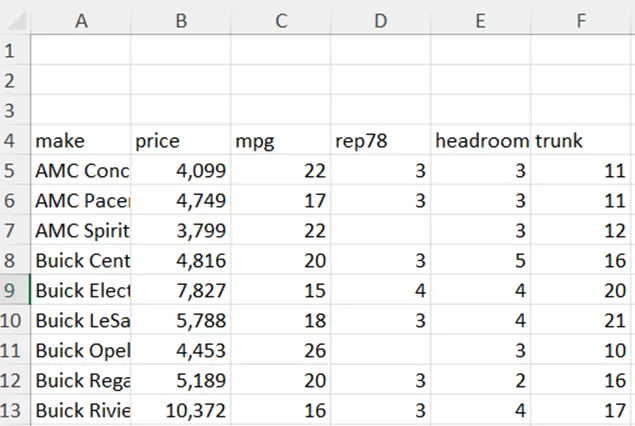
You can customize the cell address according to your specific requirements. Your data would show up like this,
Labeled and Unlabeled Data:
Your exported data file is showing the different properties of Automobiles. Upon inspection, you can see that it displays labeled values for ‘foreign’. Labeled values are those data values that have associated labels or descriptions. These provide a more human-readable interpretation of data. The export excel command, by default, exports labeled values. If you want to display unlabeled data for this variable, we can introduce the ‘nolabel’ option as such,
export excel autodta.xlsx, firstrow(variables) nolabel replace
Stata would replace the previous file while executing the nolabel option as such,
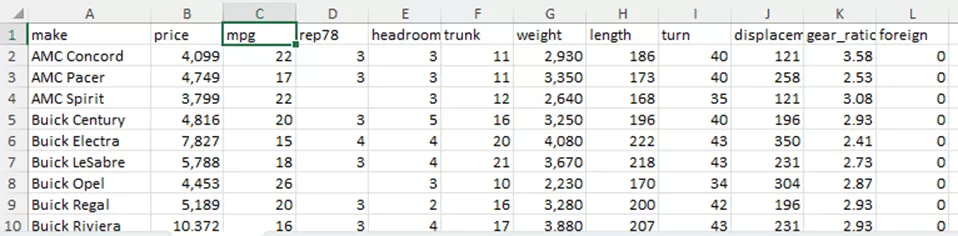
Notice how the ‘foreign’ variable is converted into unlabeled binary data. Here 0 represents the car being domestically made while 1 represents the car being foreign.
If you prefer that your data displays both labeled and unlabeled versions of data, you can add another sheet in the same file to add the labeled data. Upon close inspection of your exported Excel Spreadsheet, you will see that it has only one sheet, i.e.,

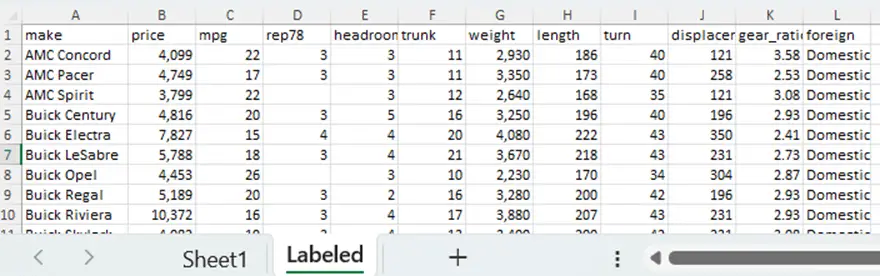
To include a new sheet with labeled data named “Labeled”, we can introduce the “sheet()” option. Your command to successfully execute the desired results should be,
export excel autodta.xlsx, firstrow(variables) sheet(“Labeled”)
Your desired sheet, with labeled data will be exported as such,
Please remember that while executing this command, we have to omit the replace option.
You can customize this sheet as per your desire too. Let us assume that for this sheet, you do not want the variables to be shown in the first row. However, if you execute the command,
export excel autodta.xlsx, sheet(“Labeled”)
you would receive an error message.

However, this error message also provides you with a way around your problem. Thus, getting guided by the error message, we use the modify and replace option to inculcate changes in the sheet. The command,
export excel autodta.xlsx, sheet("Labeled", replace)will get you your anticipated results.
The datestring Option:
You can also save the dates in your data in String format in Stata before exporting them to Excel through the datestring(“format”) option. First, ensure that you know the display formats required for your date variables. You can view these formatting options along with their codes from
help export excel
Once you decide on the format, you can devise your export excel command based on your requirements. A standard command for this would be,
export excel using "autodta.xlsx", firstrow(variables) datestring("%tdMon_DD,_CCYY") replaceRemember,
help export excel
is always ready to pull you out of any discomfort during Exports in Excel.
Happy learning!