As is the case with every statistical software, Stata has a specific syntax that needs to be conformed to when writing commands. Stata command syntax refers to the rules that need to be followed when we want to interact with a software, just like we follow grammar rules when speaking in a language.
Stata has a remarkably comprehensive documentation and guide that users can refer to anytime they need help with a command. To access the help window, we enter the command:
help summarize
In this case, a help window with the syntax details and other descriptions regarding the summarize command opens.
Understanding Stata Command Syntax
Continuing from the example of the previous command that opens up a help window for the summarize, we note that there is a separate section with the heading “Syntax”. Let’s break down the syntax for this command.

The syntax always starts with the name of the command, in this case summarize. The underline part of the command indicates that the command can be abbreviated to su as well. In addition, typing anything between su and summarize will return us the correct results; so commands like summa, summ, summar etc will also work.
To see how the command works on its own, we load an inbuilt dataset:
sysuse auto.dta summarize
This summarizes all the variables in the dataset.
Back to the syntax, the command name is followed by certain arguments in square brackets. These square brackets indicate that the argument is optional and the command can still run if they are not specified. These arguments however can enhance the usability of our commands.
Related Book: A Gentle Introduction to Stata by Alan C. Acock
[varlist]
[varlist] suggests that we can follow thesummarize command with a custom list of variables of our choice and Stata will return a summary table for only those variables. [varlist] allows us to add any number of variables. There are other commands that restrict the number of variables to only one. If we read the syntax for the generate command:help generate
We notice a compulsory argument called newvar. It is not written in square brackets because we must specify a new variable name following the command name. Only one variable name can be specified in one command. Similarly, an option within this command is (varname). This also differs from [varlist] in that it only allows one variable name, not a list.

[, options]
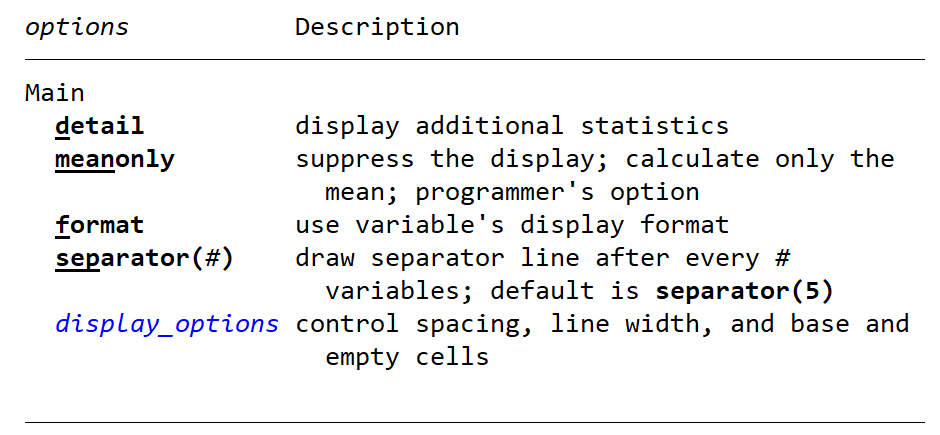
Getting back to syntax for the summarize command, we notice the syntax includes an argument called [, options]. Anything that we write after a comma is referred to as an option in Stata. Options are frequently used with Stata commands since they enhance the usefulness of the command. Right below the syntax in the help window is a section that lists all the options (along with their purpose) that can be used with that specific command. Just like commands, the underlined part of an option indicates its abbreviated version that is also valid.
summarize price mpg rep78, detail
This option shows more detailed, additional summary statistics for the variables specified.

Some options can also take arguments. For example the separator() option allows us to specify the number of variables after which the summary table would draw a line.
summarize, separator(4)
This option draws a line after every four variables in the summary table. The default is five.
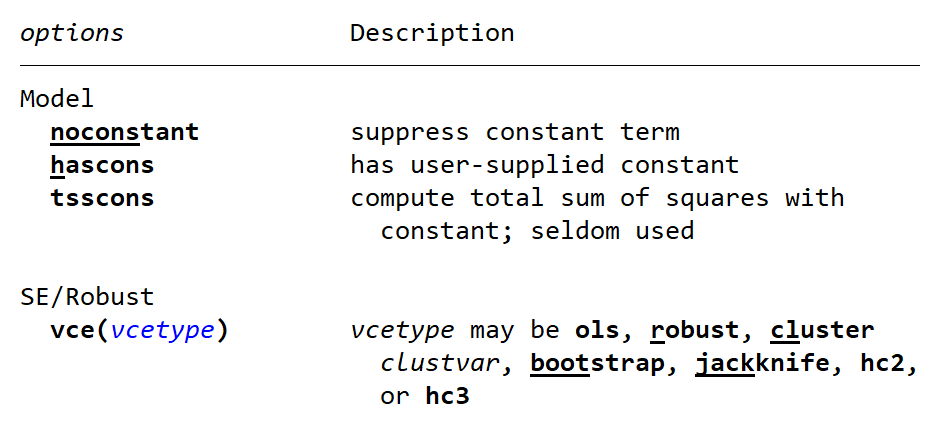
An option for one command cannot necessarily be used with other commands. For example
help regress
This help page shows a different list of options that are applicable with the regress command.

[if]
Back to the syntax for the summarize command, we also notice two arguments of [if] and [in]. These are referred to as the command modifier or command qualifier respectively. They can change the number of observations that the command is executed for.
The [if] modifier allows us to specify any criteria or set of conditions. Stata will then evaluate these conditions and apply the command for only those observations that meet this criteria. Suppose we wish to summarize the ‘price’ variable for only those observations where trunk size is greater than 15.
summarize price if trunk>15
The number of observations in the summary table is less than the total number of observations in the dataset. This is because the ‘price’ variable was summarized for only those observations where ‘trunk’ took on a value greater than 15. The if criteria essentially restricted the scope of the summarize command.
The if modifier is written only once. If we wish to add more criteria to our command, we use a relevant operator. For example, & refers to ‘and’ while | refers to ‘or’.
help operators
The command above lists more operators that can be used for other criteria.
We apply the ‘or’ operator to also include those observations where ‘rep8’ is greater than 3 along with the one that are greater than 15.
summarize price if trunk>15 | rep78>3
Related Post: Introduction to Stata Interface
[in]
The [in] qualifier restricts the scope of a command to a range of observations. For example, if we wish to summarize the ‘price’ variable only for the first ten observations, we write:
summarize price in 1/10
Equality Sign in Stata
If we want to summarize the ‘price’ variable for observations where ‘trunk’ is equal to 15, we write two equal signs.
summarize price if trunk==15
In Stata, the double equal to signs are used to refer to a value that matches our criteria. The single equal sign is used when we are assigning a value to a variable. For example:
generate price2 = . replace price2 = price*price
The first command assigns a value of ‘.’ to the new variable. The second command replaces the variable and assigns each observation a value that equals the square of price.
Using The ‘by’ Prefix
Some commands allow the use of the ‘by’ prefix which is followed by a categorical variable. The command then outputs data separately for each category. For example, the ‘foreign’ variable categorises cars into foreign (=1) or domestic (=0)
by foreign: summarize price
This command outputs summary statistics for the ‘price’ variable separately for domestic and foreign cars. This prefix is useful when we want analyse statistics for every category separately.
An Interesting Case: ‘drop’
An interesting case to contrast the examples above is that of the drop command.
help drop
The help window for this command shows us that firstly, we cannot abbreviate the command since it is not underlined. Secondly, the syntax also suggests that options cannot be used with this command. Thirdly, it is necessary to specify one or more variables (a variable list is allowed) following the command.
Converting String Values to Numeric: destring
We illustrate another feature of Stata’s syntax using the destring command as an example.
help destring
This command converts any specified string variable into a numeric one. In the help window, one of the options for this command is enclosed in curly brackets. The curly brackets contain two arguments which are separated by the ‘or’ operator | .
{generate(newvarlist) | replace}This means that it is mandatory to specify any one of the arguments within the curly brackets for the command to work. In this case, the user needs to either specify an option that generates a new variable, or an option that replaces the existing variable. If a new variable containing all the numeric values is generated, its name needs to be entered in the parenthesis of generate(). If the replace option is chosen, the existing string values in the variable will be replaced by the numeric values.
Click here to read the Stata’s manual regarding syntax.
